How to run A/B tests in Android
Nov 22, 2023
A/B tests enables you to compare the impact of your changes on key metrics.
PostHog makes A/B testing on Android simple. To show you how, this tutorial will guide you on how to run an A/B test with PostHog on an app built with Kotlin and Jetpack Compose. We will create a simple A/B test to see how the background color of a screen affects the click-through rate of a button.
Creating a new Android app
Our app will have two screens:
- The first screen will have a button which will take you to a second screen.
- The second screen will either have a
red
orgreen
background color depending on if the user is in thecontrol
ortest
group of the A/B test. It will also have a button which captures an event when pressed. We'll use this event as our goal metric for our test.
The first step is to create a new app. Open Android Studio and create a new project. Select Empty Activity
, name your project My-AB-Test
, and use the defaults for everything else.
Then, replace your code in MainActivity.kt
to set up a basic UI with a button to navigate to a new screen.
package com.example.my_ab_testimport android.os.Bundleimport androidx.activity.ComponentActivityimport androidx.activity.compose.setContentimport androidx.compose.foundation.layout.Arrangementimport androidx.compose.foundation.layout.Columnimport androidx.compose.foundation.layout.fillMaxSizeimport androidx.compose.material3.Buttonimport androidx.compose.material3.MaterialThemeimport androidx.compose.material3.Surfaceimport androidx.compose.material3.Textimport androidx.compose.runtime.Composableimport androidx.compose.runtime.rememberimport androidx.compose.runtime.mutableStateOfimport androidx.compose.ui.Alignmentimport androidx.compose.ui.Modifierimport androidx.compose.ui.graphics.Colorimport androidx.compose.ui.tooling.preview.Previewimport androidx.navigation.NavControllerimport androidx.navigation.compose.NavHostimport androidx.navigation.compose.composableimport androidx.navigation.compose.rememberNavControllerimport com.example.my_ab_test.ui.theme.MyABTestThemeclass MainActivity : ComponentActivity() {override fun onCreate(savedInstanceState: Bundle?) {super.onCreate(savedInstanceState)setContent {MyABTestTheme {Surface(modifier = Modifier.fillMaxSize(), color = MaterialTheme.colorScheme.background) {MyApp()}}}}}@Composablefun MyApp() {val navController = rememberNavController()NavHost(navController = navController, startDestination = "main_screen") {composable("main_screen") {Greeting("Android", navController)}composable("second_screen") {SecondScreen()}}}@Composablefun Greeting(name: String, navController: NavController, modifier: Modifier = Modifier) {Column(modifier = modifier.fillMaxSize()) {Text(text = "Hello $name!")Button(onClick = { navController.navigate("second_screen") }) {Text("Go to next screen")}}}@Composablefun SecondScreen() {val isTestVariant = remember { mutableStateOf(false) } // We'll set this value later in the tutorialval backgroundColor = if (isTestVariant.value) Color.Green else Color.RedSurface(modifier = Modifier.fillMaxSize(), color = backgroundColor) {Column(modifier = Modifier.fillMaxSize(), horizontalAlignment = Alignment.CenterHorizontally, verticalArrangement = Arrangement.Center) {Button(onClick = { /* Do nothing for now */ }) {Text("Click Me!")}}}}@Preview(showBackground = true)@Composablefun DefaultPreview() {MyABTestTheme {MyApp()}}
Make sure to add implementation("androidx.navigation:navigation-compose:2.4.0")
to your dependencies
in to app/build.gradle.kts
and sync your project with the Gradle files.
Our basic set up is now complete. Build and run your app to test that it's working.
Adding PostHog to your Android app
First, add the PostHog Android SDK as a dependency in your Gradle Scripts/build.gradle.kts (Module: app)
file. You can find the latest version on our GitHub. For this tutorial, we use version 3.1.7
.
dependencies {implementation("com.posthog:posthog-android:3.+")//... other dependencies}
Sync your project with your Gradle file changes.
Next, we create a Kotlin class where we can configure our PostHog instance. In the src/main/java/com.example.my_ab_test
folder, add a new file MyABTestApplication.kt
, add the following code:
// in MyABTestApplication.ktpackage com.example.my_ab_testimport android.app.Applicationimport com.posthog.android.PostHogAndroidimport com.posthog.android.PostHogAndroidConfigclass MyABTestApplication : Application() {companion object {private const val POSTHOG_API_KEY = "<ph_project_api_key>"private const val POSTHOG_HOST = "https://us.i.posthog.com" // usually 'https://us.i.posthog.com' or 'https://eu.i.posthog.com'}override fun onCreate() {super.onCreate()val config = PostHogAndroidConfig(apiKey = POSTHOG_API_KEY,host = POSTHOG_HOST)PostHogAndroid.setup(this, config)}}
To get your PostHog API key and host, sign up to PostHog. Then, you can find your API key and host in your project settings.
We now need to register our custom application class. Go to AndroidManifest.xml
and add android:name=".MyABTestApplication"
within the <application
tag:
<?xml version="1.0" encoding="utf-8"?><manifest xmlns:android="http://schemas.android.com/apk/res/android"xmlns:tools="http://schemas.android.com/tools"><applicationandroid:name=".MyABTestApplication"<!-- rest of config --></application></manifest>
Finally, we capture a custom event when the button on SecondScreen
is clicked. We'll use this event as our goal metric in our A/B test.
Update the SecondScreen
function in MainActivity.kt
to the following:
// in MainActivity.ktimport com.posthog.PostHog// ... [Rest of your imports and MainActivity code]@Composablefun SecondScreen() {val isTestVariant = remember { mutableStateOf(false) } // We'll set this value later in the tutorialval backgroundColor = if (isTestVariant.value) Color.Green else Color.RedSurface(modifier = Modifier.fillMaxSize(), color = backgroundColor) {Column(modifier = Modifier.fillMaxSize(), horizontalAlignment = Alignment.CenterHorizontally, verticalArrangement = Arrangement.Center) {Button(onClick = {PostHog.capture("feature_button_clicked");}) {Text("Click Me!")}}}}
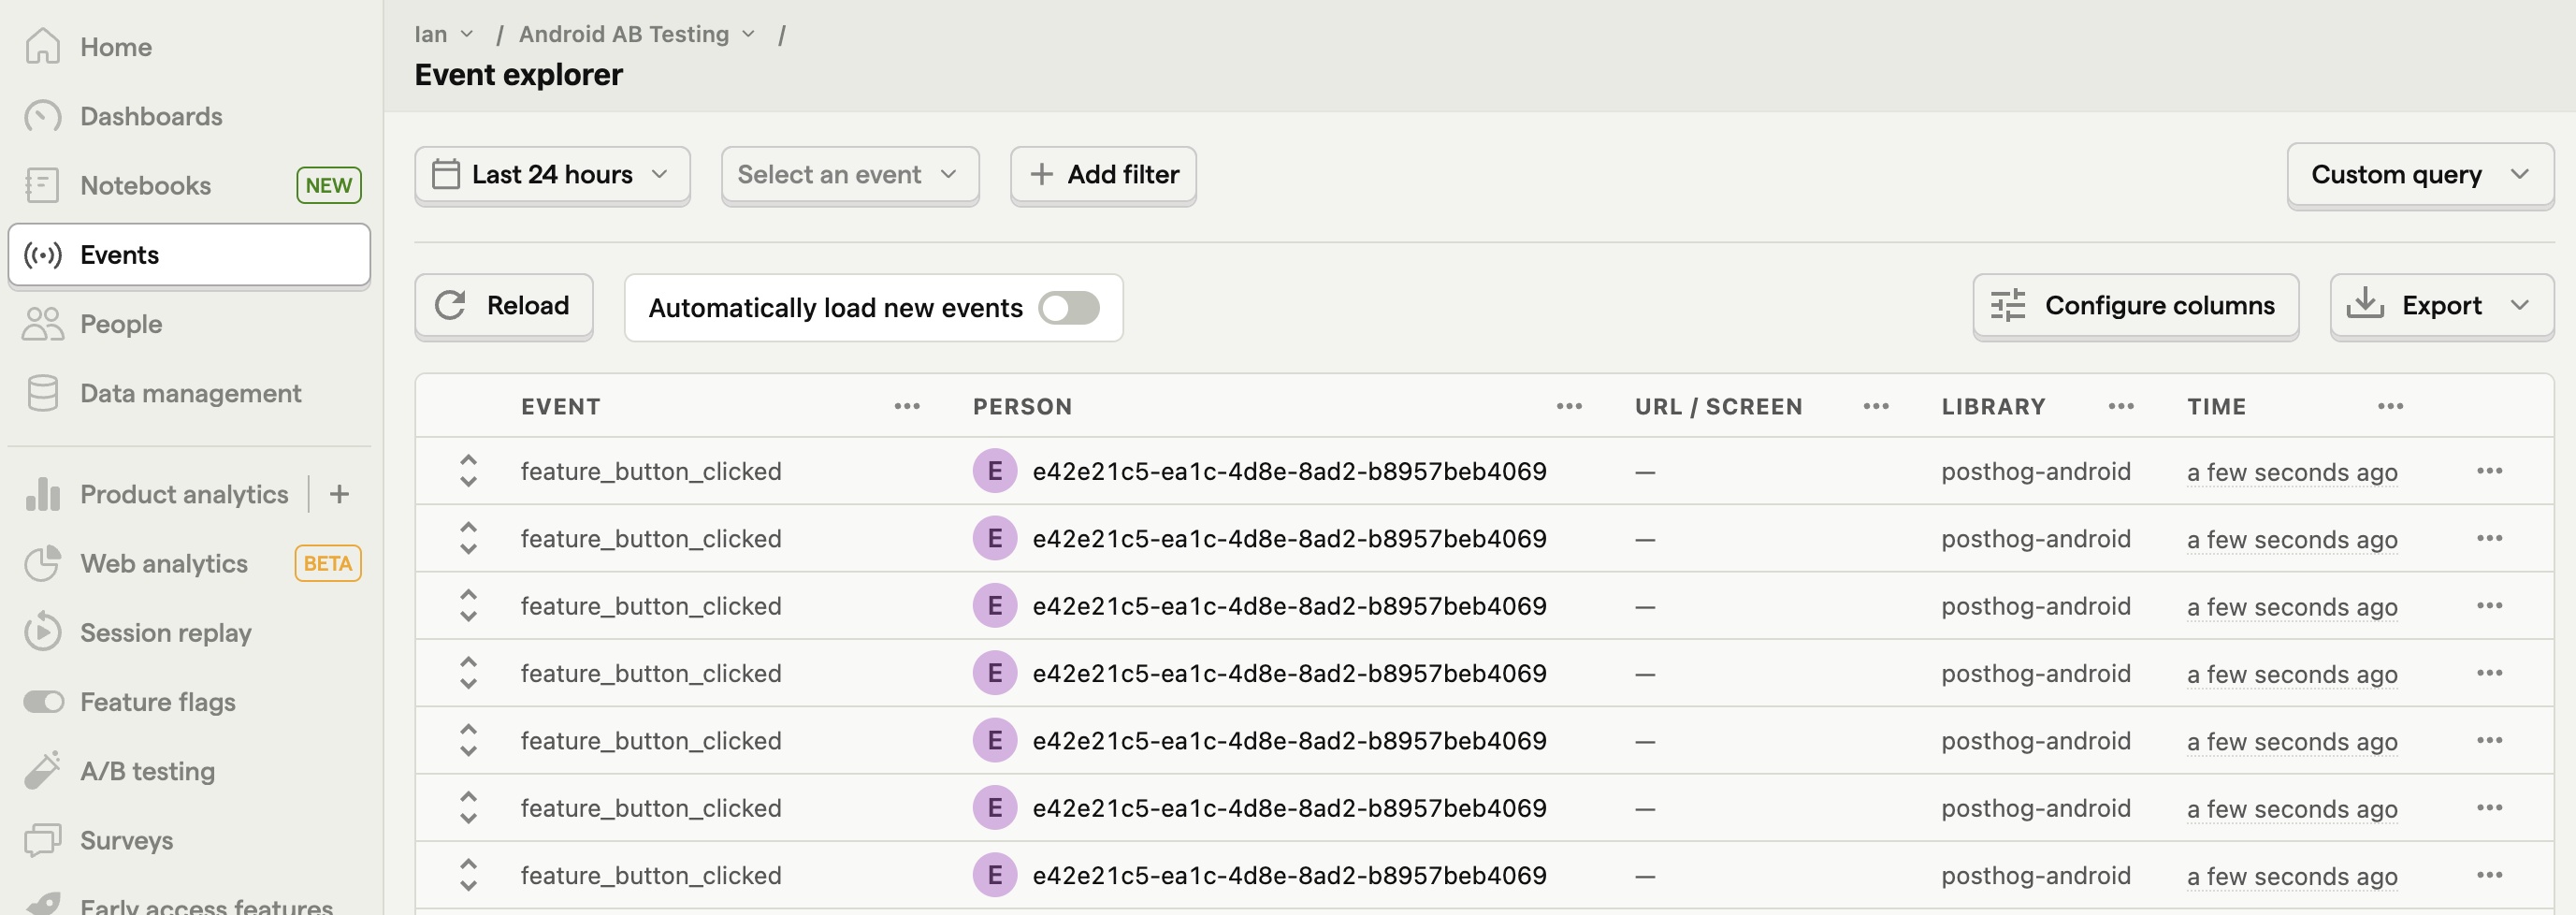
To check your setup, build and run your app. Click your button a few times and you should start seeing events in the activity tab.
Create an A/B test in PostHog
The next step is to set up an A/B test (we call them experiments in PostHog).
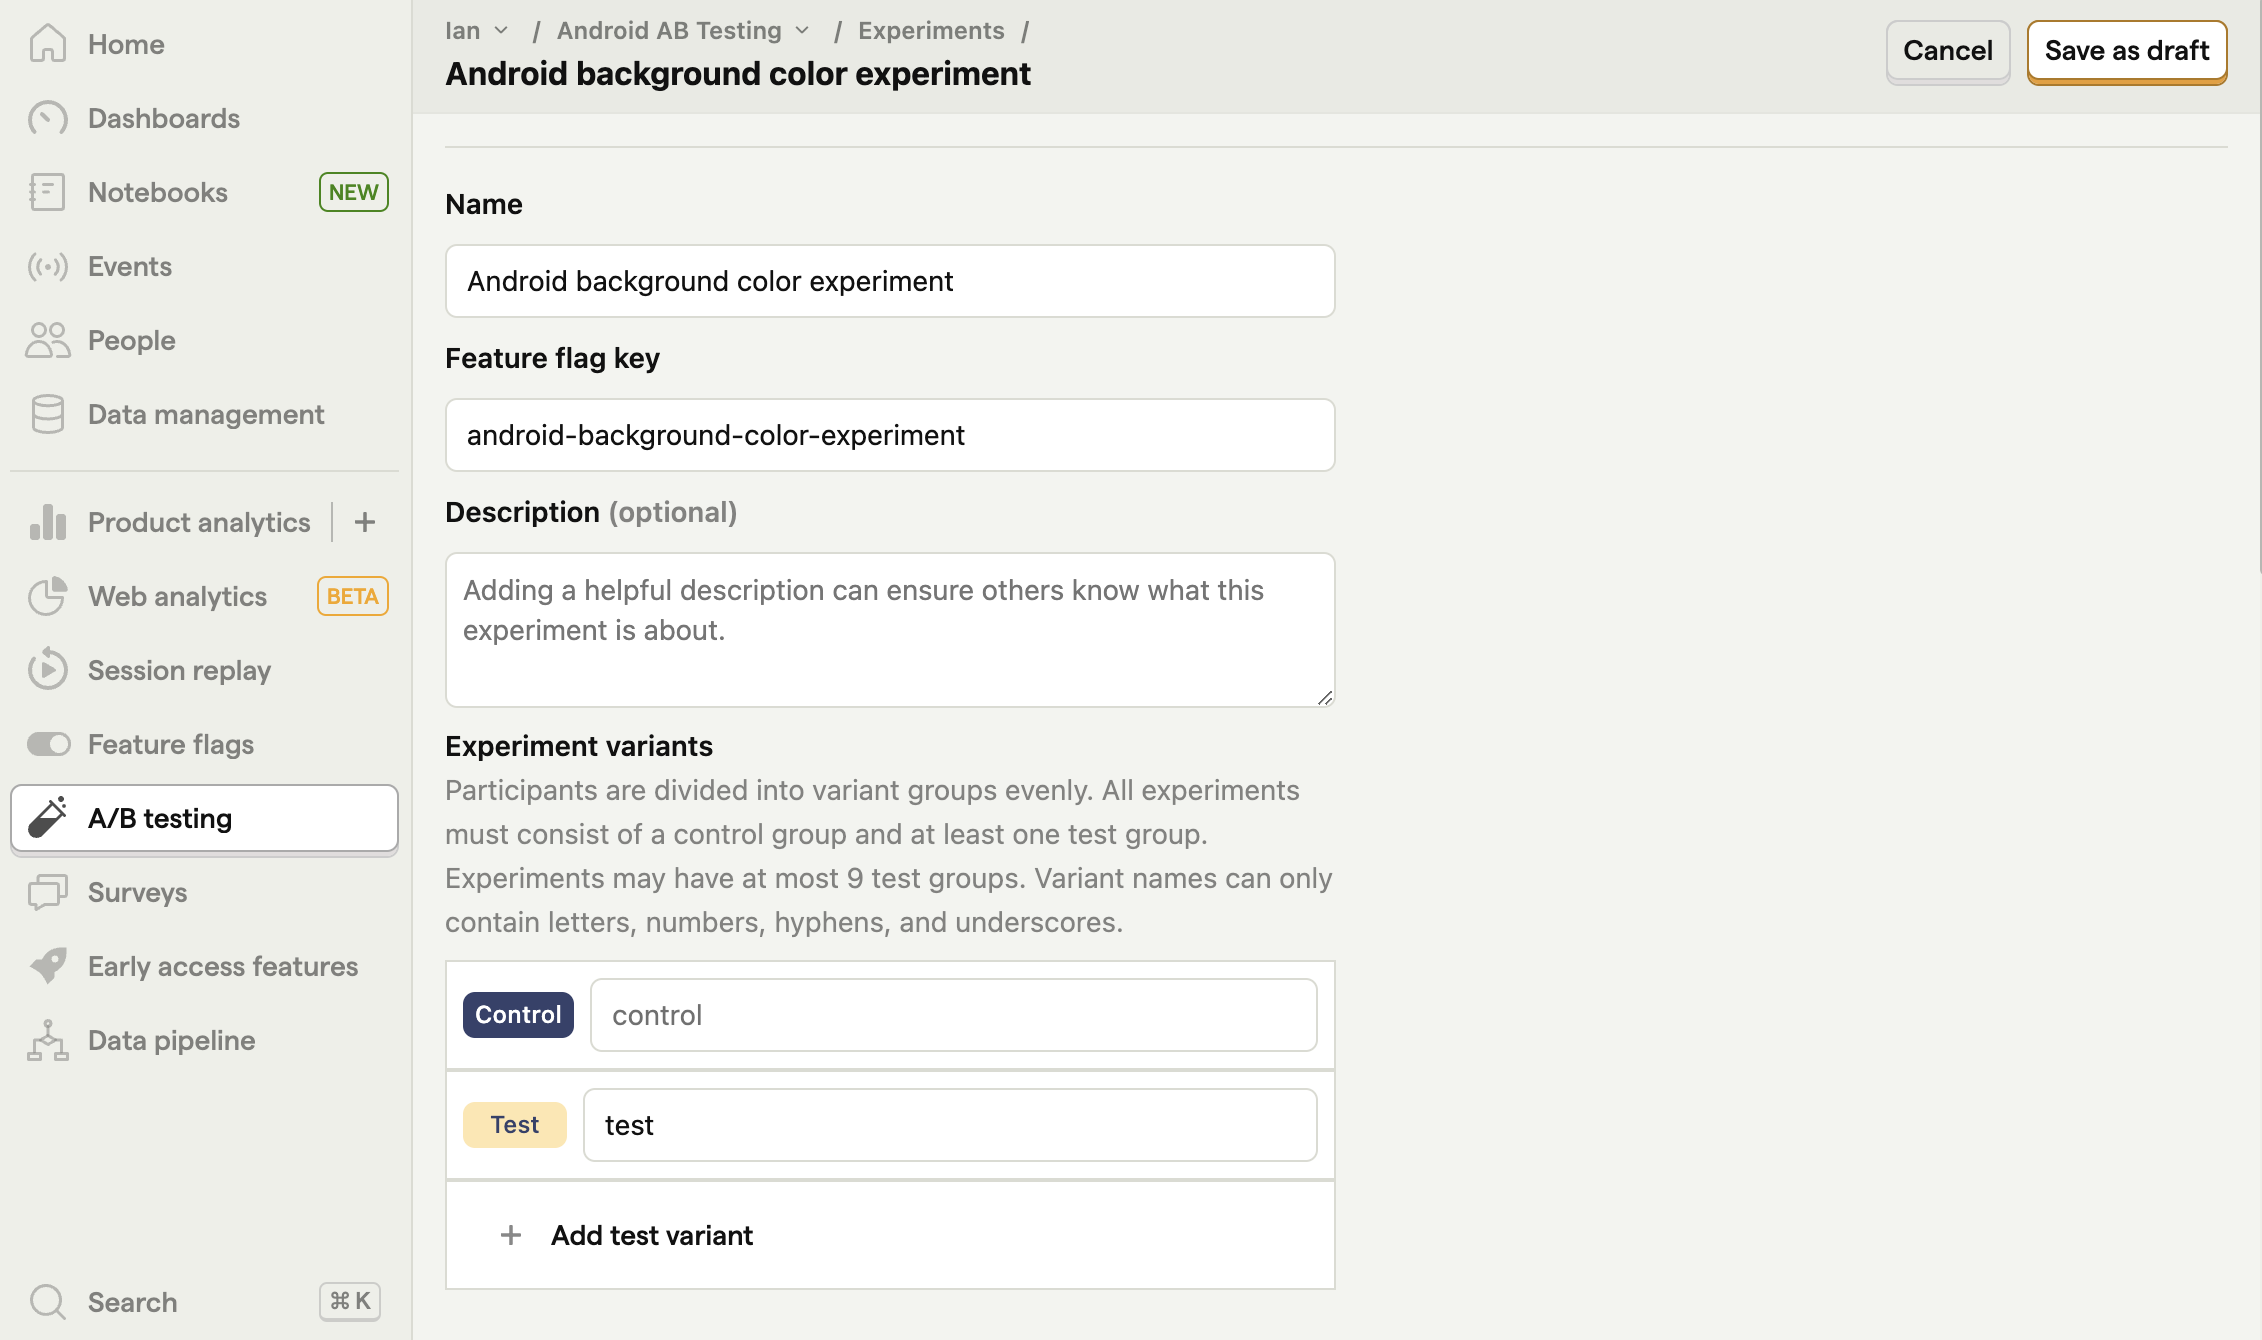
Go to the Experiments tab in PostHog and click "New experiment". Add the following details to your experiment:
- Name it "Android background color experiment".
- Set "Feature flag key" to
android-background-color-experiment
. - Under the experiment goal, select the
feature_button_clicked
we created in the previous step. - Use the default values for all other fields.
Click "Save as draft" and then click "Launch".
Implement the A/B test code
The final step is to add the experiment code that does the following:
- Retrieve the value of the
android-background-color-experiment
flag whenSecondScreen
is initialized. - Change the background color of
SecondScreen
based on the value of the flag (control
ortest
).
To do this, update the code in MainActivity.kt
with the following:
// in MainActivity.ktimport androidx.compose.runtime.LaunchedEffect// ... [Rest of your imports and MainActivity code]@Composablefun SecondScreen() {val isTestVariant = remember { mutableStateOf(false) }LaunchedEffect(key1 = Unit) {isTestVariant.value = PostHog.getFeatureFlag("android-background-color-experiment") == "test"}val backgroundColor = if (isTestVariant.value) Color.Green else Color.RedSurface(modifier = Modifier.fillMaxSize(), color = backgroundColor) {// ... [rest of SecondScreen code remains unchanged]}}// ... [rest of the file remains unchanged]
That's it! Your A/B test is now ready. When you run your app, you see either green or red as the background color of SecondScreen
and PostHog will capture button clicks for each variant to calculate if changing the color has a statistically significant impact.
If you want to test both variants of your experiment to make sure they are working correctly, you can add an optional override to your feature flag.
Lastly, you can view your test results on the experiment page.
Further reading
- A software engineer's guide to A/B testing
- How to set up feature flags in Android
- How to set up analytics in Android
Subscribe to our newsletter
Product for Engineers
Practical tips on becoming a better engineer and building successful products. Read by 25k founders and engineers.
We'll share your email with Substack